How To Remove D Pad From Xbox One Controller
Follow these steps to open the Xbox One controller. 2PCS Dpad Key Button Metal Patch D Pad Abxy Conductive Film Metal Dome Snap for Xbox One Controller Xbox One Slim Controller.

Fix Xbox One D Pad If Not Clicking Properly How To Clean Sticky Buttons Youtube
Step 2 Side Handles We recommend using a nylon spudger for this step.
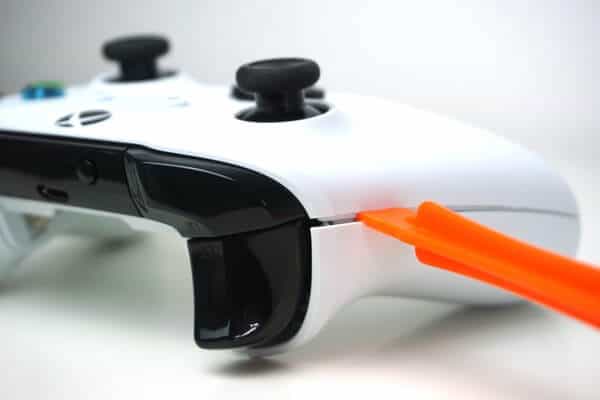
How to remove d pad from xbox one controller. Remove the battery cover. Step 1 D-pad Remove the side handles with the iFixit plastic opening tool by wedging it around the seam of the handles. Using the plectrum or spudger detach the plastic panels on the back of the controllers handles where the controller sits in your hand.
Step 3 Screws There is a hidden screw located in the middle of. Stay on target with a hybrid D-pad and textured grip on the triggers bumpers and back-case. Remove the batteries saving them for later.
Remove the battery pack cover. When I press up it doesnt seem to respond. Continue using the opening tool to gently pry the side plate off of the controller.
Once the covers have started to separate you can finish carefully pulling them off by hand. I have to mash it several times to get it to work. 39 out of 5 stars.
Some responses suggested pair it with a new console to override this pairing. Clean Inside the Xbox Controller. Repeat this process for the second side plate.
I was sick and tired of selecting the wrong weapons in Gears of War because of the XBox controllers sloppy D-Pad. Slide the pry tool between the plastic seam on the grips as shown. FREE Shipping on orders over 25 shipped by Amazon.
What Should You Clean Inside the Xbox One Controller. Xbox one controller D Pad sticking and double clicking issue FIXED easy way. Step 2 Side Handles.
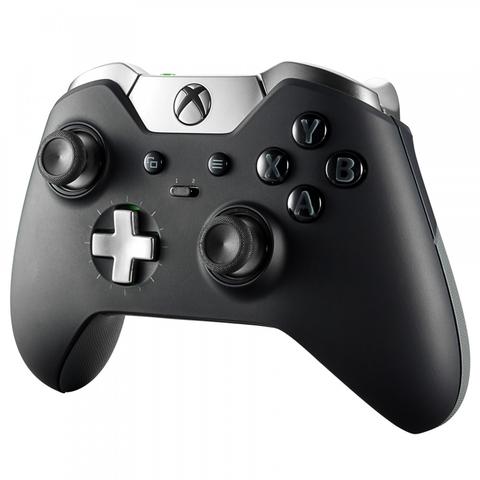
The removable parts of the Xbox Elite Wireless Controller and Xbox Elite Wireless Controller Series 2 include the left and right thumbsticks the D-pad and the four paddles on the back of the controller. Remove the door to the battery compartment and set it aside. This is just a quick video on how to change the dpad on an xbox one controller as someone in my previous post had asked me how to do it.
Lever the grip away from the main controller body. It still works very well but the d-pad is giving me issues. A metal spudger is shown.
There is a hidden screw located in the middle. Inside and out aim to clear any dirt and detritus that might have gathered. Experience the modernized design of the Xbox Wireless Controller in Pulse Red featuring sculpted surfaces and refined geometry for enhanced comfort during gameplay with battery usage up to 40 hours.
Start by wiping the shell down with a damp cloth. Where did you find the specific torx screw with the security pin to open the controller. So now the brand new controller is effectively useless except as a spare controller on the console.
I can also blow into the d-pad which gets it to respond perfectly for about fifteen seconds after which it goes back to being unresponsive. Insert a plastic opening tool into the top seam and gently work the opening tool to the bottom of the controller. Ive tried to remove the device from the PC and re-pair but it just wont find it now.
Be careful not to break the clips when removing the handles. Get it as soon as Wed May 12. Each removable part is made of tough durable steel and is magnetized to fit in the proper location on your controller.
Repeat the process with the other grip cover. Note that there is. One great feature of.
Xbox One Tool Kit - httpsamznto2JuMhQeBroken D-Pad Xbox One Controller How To FixWiha Security Screwdrivers - httpsamznto2zFQOtiTresalto Trim. Remove Grime from the Nooks and Crannies. Xbox One Wireless Controller D-Pad Replacement Step 1 Battery Pack Remove the battery pack cover.
Heres how to take apart your Xbox One controller. So after looking through the internet trying to find a way to stop my d pad double clicking to no real avail having downloaded the game controller tester from the store it became obvious my left D pad button wasnt working correctly and flashing while holding it down. Mods to the controller online required inserting a crappy piece of plastic sanding hard to reach areas andor soldering new internals which is more time consuming than just a direct replacement of which I desired.
A metal spudger is shown. My Day One Controller has seen a lot of use. Xbox One Wireless Controller D-Pad Replacement Step 1 Battery Pack.
Use a prying tool to gently separate the right or left grip cover. Theres no option to remove device on the Xbox. We recommend using a nylon spudger for this step.

Xbox Series X Is Bringing Back The Disc Shaped D Pad But Microsoft Says This Time It Ll Work Usgamer
Xbox One How To Fix Your Controller Dpad Youtube
Xbox One Elite Controller Model 1698 D Pad Replacement Ifixit Repair Guide


Xbox One D Pad Not Clicking And Double Clicking Fix Youtube

Diy Fix The D Pad On The Xbox 360 Control Pad More Than Just Sanding 4 Steps Instructables
How To Take Apart Xbox One Controller Step By Step Diy Method
Xbox One Wireless Controller D Pad Replacement Ifixit Repair Guide

Xbox One Wireless Controller D Pad Replacement Ifixit Repair Guide

Xbox One Wireless Controller D Pad Replacement Ifixit Repair Guide


Xbox One Controller Faulty D Pad Repair Youtube

How To Install Xbox One Elite Controller Dpads Extremerate Youtube
Xbox 360 Wireless Controller D Pad Replacement Ifixit Repair Guide


How To Open An Xbox One Controller Xboxdiy
Steam Community Guide Xbox One Controller D Pad Fix
:max_bytes(150000):strip_icc()/dpadring1-05d466c732e043c4a141d8516df1917c.jpg)
How To Take Apart An Xbox One Controller

Stock Xbox One Controller Elite Mod Thumb Sticks And D Pad Youtube
:max_bytes(150000):strip_icc()/9-8d443f20e8d846ce8d557f114b04e655.jpg)
How To Take Apart An Xbox One Controller
Xbox One Wireless Controller 1697 Model D Pad Replacement Ifixit Repair Guide

Xbox One Wireless Controller D Pad Replacement Ifixit Repair Guide

Post a Comment for "How To Remove D Pad From Xbox One Controller"